+86-13777534479
Views: 999 Author: Site Editor Publish Time: 2022-07-28 Origin: Site


When a friend conducted a weapons inspection at his department recently, he was dismayed to find that most of his officers did a poor job of maintaining their duty firearms. The striker-fired guns (like the Glock pistols and Smith & Wesson M&P pistols) that are so popular with police officers were in especially bad shape and demonstrated a distressing number of failures to fire and eject as a result of poor maintenance practices.
To help make a dent in this problem, let’s discuss what you need to do in order to keep your Glock pistol running well.
While we’re singling out the Glock pistol in particular, because of its dominance in the law enforcement market, this information will also apply to similar, striker-fired pistols like the Smith & Wesson M&P series, the Springfield XD/XDM series and the Sig Sauer P320. With slight modifications, it will also apply to hammer-fired pistols of various designs.
Before we dive into the particulars, a few general rules apply:
Read your owner’s manual! Cops being cops, I know most of you have never cracked this open! Do yourself a favor and read the manual that came with your gun for the manufacturer’s recommendations on how to disassemble, clean and reassemble your pistol. There’s some good stuff in there, honest.
Follow the safety rules! It’s essential to follow your agency’s firearms safety rules every time you handle your firearm. Before you attempt to disassemble and clean your firearm, you must safely unload/clear it in accordance with the process described by the manufacturer or your agency, and ensure that the ammunition remains separate from the gun (ideally, in another location) until you’ve made the conscious decision to load it again.
Protective measures. Wear safety goggles to protect your eyes, and disposable gloves to keep lead and chemical residue off your skin. Ensure the area you’re working in has adequate ventilation. Clean up your work area when you’re finished, then wash your hands and face with cold water and soap (cold water is better than hot, to keep your skin’s pores from opening up and increasing your exposure), to avoid getting any chemicals or residue in your eyes, nose, or mouth.
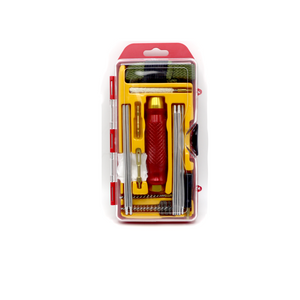
A variety of cleaning products, tools and methods are available. Our goal here is to discuss a simple method, using common resources, so if you have a different technique or favor a different product, please continue with it ‒ we’re not trying to talk you out of it.
Starting with your protective equipment in place, and a field-stripped firearm, do the following:
Run a solvent-soaked patch through the chamber and bore of your barrel several times, coating the feed ramp, chamber and interior of the barrel evenly. Set the barrel aside to soak.
Wipe the interior of your slide with a dry patch or rag, to get the big stuff off. Wet a toothbrush with a small amount of solvent, and scrub the interior surfaces, paying close attention to the breech face and slide rails. As you’re scrubbing, try to hold the slide muzzle end down to avoid having the solvent run into the interior of the striker channel, which we want to keep dry. Set the slide aside to soak for a while, muzzle end down, so that any solvent that made its way into the striker channel can drain out.
Clean the frame of your pistol with a dry patch or rag. Get the carbon, dirt and other fouling off the exterior of the frame, the interior of the magazine well and the accessible interior of the gun. Wipe down the rails, trigger bar, ejector and connector area as well (refer to your manual to identify these parts if you don’t know what they are).
Now that you’ve got the big stuff off the frame, go back through with a toothbrush and a clean patch or rag to get the nooks and crannies clean. You may need to put a little solvent on the brush or patch to get some of the fouling off these parts ‒ if so, make sure you wipe the surfaces clean afterward and don’t leave a bunch of solvent behind. If necessary, use an air hose or a can of compressed air to blow the solvent out of the areas where it may be hiding. The goal here is to get everything clean and dry.
Wipe down your recoil spring assembly with a dry patch or rag. It shouldn’t need much attention ‒ just try to get it clean and dry. A dry toothbrush might help, too.
Wipe down the exterior of your magazines with a dry patch or rag to get the carbon fouling and dirt off. Pay close attention to getting the follower and feed lips clean – a dry brush might be helpful here. If you’re concerned that water, sand, dirt or other debris got inside the magazine, then you’ll want to disassemble the magazine and clean it, as we’ve previously discussed here. That’s a good thing to do periodically anyhow, but you don’t have to disassemble your magazines for cleaning every time. Once again, your goal is to get your magazines clean and dry. Don’t lubricate them or leave any solvent behind to attract more dirt. Clean and dry.
Let’s return to the slide. Scrub it a little more with your brush, then wipe everything down to get the interior and exterior clean and dry. To get the rails clean, push a dry patch down into the rail with your toothbrush or a non-marring tool (like a plastic pick, wooden toothpick, or the paper shaft of a Q-Tip) and wipe clean from end to end – you’ll probably need several passes to do this. Make sure the breech face is clean and smooth, with no raised fouling on the surface (like rings of carbon or primer sealant). If necessary, use a brass brush or a non-marring tool to scrub or scrape the breech face clean. Get a clean patch behind the extractor hook and remove any gunk that built up there. (It will be periodically necessary to disassemble the slide to clean the extractor properly, and the striker/channel as well ‒ talk to your department armorer about this.) Lastly, wipe down the exterior. Remove any gunk around the extractor pocket, and ensure that your sights are cleaned off, so you can see them properly.
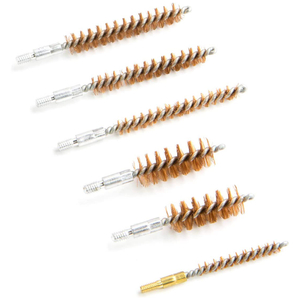
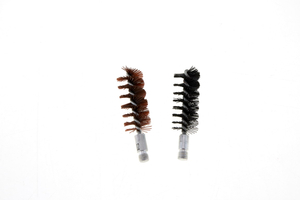
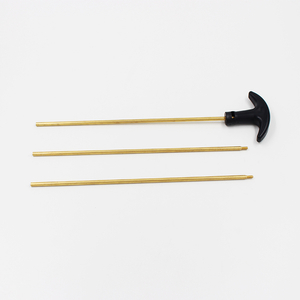
Time for the barrel again. Run that solvent-soaked patch through the bore several more times, then run a few dry patches through the bore to get the gunk out and get the bore mostly dry. Use a dry patch or rag to clean up the feed ramp, to make it clean and shiny (a toothbrush might help, if it’s really fouled). Put a bristle brush on the end of the cleaning rod and run it through the barrel, from the rear, about 5-10 times. Wet a patch with oil and swab the barrel to clear out any particulates, then follow up with dry patches through the barrel to remove any oil and suspended debris. Inspect the bore and chamber to ensure they are clean. If not, then repeat the process as required, until you get the results you want. Wipe down the exterior of the barrel with your rag, so that both interior and exterior are clean and dry.